Fokker DVIII
When I was a teenager I thumbed through the usual modelling mags and could only dream of a radio controlled scale model even if they were fairly basic by today's standard.
With the cost of the Veron kit and accessories, plus the radio gear, one was talking about many weeks of a working man's wage. My paper round did not come close. No chance.

45 years later and I purchased a reproduction laser cut short kit from Belair Kits.
Purchased the plans, strip wood and the radio gear.
The model will be fitted with single channel, rudder. I will keep the model to fly free flight but have the advantage of landing it in the same field I launched it in. My legs are not what they were.
After all these years of modelling this is my first German type.

This is basic and the wood is very chunky.
I like to start with the tail surfaces as it gives me thinking time and gets the little grey cells working.

Similarly, the one piece wing is straight forward and incorporates a slight dihedral angle to assist stability.


The fuselage is a basic box section made from 1/4" squ balsa.
The cabane wires were fitted with the aid of temporary jigs to align the wing mounts, as per instructions.
The fuselage mountings for the cabane wires and U/C tubes are of channelled spruce. Wires and tubes are epoxied into place and bound with nylon ribbon
I have changed the undercarriage arrangement, from a solid one piece permanent construction, so that I can incorporate a bungeed axle. The U/C legs will be fitted into brass tubes on the underside of the fuselage so that I can plug them in and remove them to facilitate repair or replacement.

As you can see, the plan has a beach bearer and ply mounting plate for the engine. I opted for a modern nylon radial mount. This will give me plenty of room for a free flight fuel tank. It is also very easy to adjust engine thrust-lines, with ply wedges behind the mount, during trimming.
Engine is an AM10 mark 1. It is powerful for its size but if it is proves to be lacking then I can fit an AM15. Same external dimensions. That's Handy!


The cowling is modified from a commercial ali' unit that I purchased at the Nationals some 20 years ago. A £5 bargain.
One of those items you just cannot leave on the shelf even if you have no immediate use for it.
The eagle eyed amongst you may have noticed that the radius of the cowling is a bit too rounded for a Fokker Dviii.
It is a Sopwith cowling but just by chance is the right diameter.
I cut a plate with the "face" and epoxied it to the inside with a reasonable overlap. The bottom of the cowl was then cut away and filed to shape.
It will be fixed in place with 3 screws through the beach blocks

Fuselage formers have been added. The ali cowling has a slightly larger diameter than the one that was supplied in the original kit and the formers have been adjusted with "shims" of balsa to slightly enlarge them and maintain the taper to the fuselage 1/16th balsa sheeting.

The fuselage is covered in 1/16th sheet balsa back to the cockpit and the top decking back to the tailplane. This model is bomb proof.
The undercarriage is secured to the fuselage in brass tubes as opposed to being permanently fixed. This will enable me to replace the U/C if needed, relatively easily.
The wheels are made up of laminations of balsa and ply. Turned on a lathe and grooved to accept the neoprene tyres.

The "wing" between the wheels has an aerofoil and is made from a sandwich of 1/4" balsa epoxied to either side of the axle. The two pieces of balsa were tacked together and shaped. Then separated and shaped to fit around the u/c wires and axle.
The model weighs 22ozs with the engine, radio etc.

The tail surfaces are double covered with med weight jap tissue with the tissue grain at right angle to each other.
The wing is also double covered but this is silk over heavy weight jap tissue.

The fuselage is covered in medium jap tissue and then covered in very thin note pad paper that has been printed with a suitable lozenge pattern found on the web. A couple of coats of banana oil finishes the job


Model was painted with matt enamel paint and used a mile of masking tape on the markings. Two coats of satin fuel proofer to obtain a realistic surface texture.
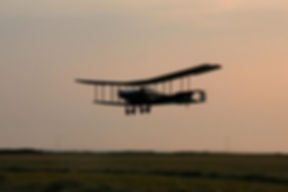
Photograph of the subject model included for comparison.